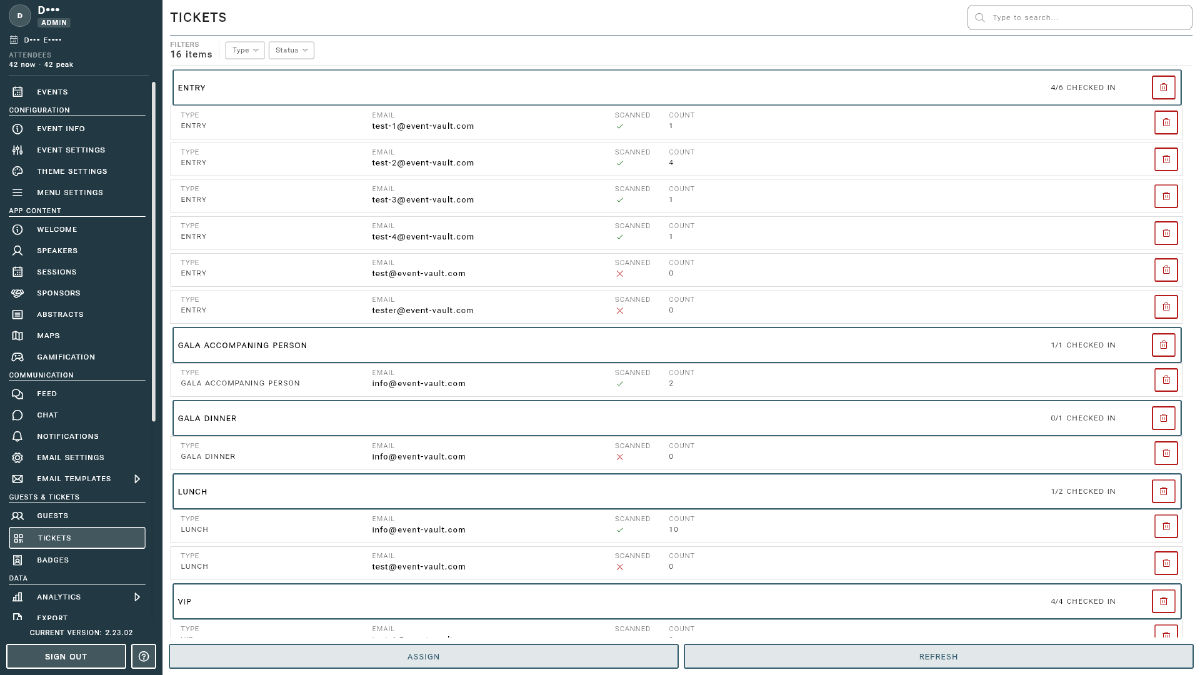
Tickets
How to assign and manage tickets for your event.
Tickets in Event Vault control what your attendees can access. Use entry tickets for general event admission and session tickets for capacity-controlled sessions that require pre-registration. You can create multiple ticket types to segment your audience and manage access efficiently.
Access tickets vs. paid ticket products
Event Vault has two related but distinct ticketing concepts:
- Access tickets (this page): control what a guest can see and do inside the app. You assign them to guests directly, with no payment involved.
- Ticket products (in Ticketing & Sales): paid tickets that attendees purchase through your registration form, with prices, add-ons, promotion codes, and tax settings. A completed purchase automatically grants the buyer the matching access.
If you are running a free or invitation-only event, you only need access tickets. If you are selling tickets, set up ticket products and let purchases grant access automatically.
Ticket Types
In the Tickets section of the Management Console, you can create ticket categories. Each ticket type has:
- Name: a label for the ticket type (e.g., “General Admission”, “VIP”, “Workshop Pass”).
- Description: optional details about what the ticket includes.
- Capacity Limit: optionally limit how many tickets of this type can be assigned.
- Tier/Access Assignment: assign the ticket type to a sponsor or access tier.
Each ticket type appears as an option when assigning tickets to guests.
Assigning Tickets
- Go to the Tickets section in the Management Console for your event.
- Click ASSIGN TICKETS to open the ticket assignment menu.
- Select or import a CSV file with guest email addresses and specify the ticket type.
Data Format
Format of the CSV file, including headers and example rows.
| Column | Format | Contains |
|---|---|---|
| A | String | Guest email address |
| B | String | Optional. An external QR value for this guest (see below). Leave empty for a normal ticket |
Tickets scanned by another system
Some venues and conferences run entry through their own access-control or badge system, which expects a QR code in a format of its own. For those, give the ticket an external QR value: the attendee still finds the ticket in the app and in the guest portal, but its QR code is exactly the value you supplied, with nothing added around it.
Set it in one of two ways:
- One guest at a time: fill in the “External QR Value” field in the ASSIGN TICKETS dialog.
- In bulk: put the value in column B of your import CSV, next to that guest’s email address.
Values are stored exactly as you enter them and do not have to be unique, because the system that issued them decides what they mean. You can also set them through the Tickets API.
Two things to keep in mind:
- Event Vault’s own ticket scanner cannot read these codes. Check-in is handled entirely by the system that issued them, so the ticket list shows the check-in status as “External” rather than counting scans.
- The ticket says so to the attendee. Both the app and the guest portal mark it “EXTERNAL TICKET” above the QR code. The code itself is not printed out, since it only needs to be scanned and can be long. If you want to tell attendees where the ticket is scanned, fill in External Ticket Note in Event Settings and your sentence appears under the QR code, for example “Scanned at the main entrance turnstiles.” Leave that setting empty and no note is shown.
Managing Tickets
- View all assigned tickets and their check-in status in the ticket list.
- Use the Delete icon to remove a ticket from a guest.
- Check in guests using the companion app’s ticket scanner or manually in the console.