PUsh Notifications
This section offers a step-by-step guide on how to add notifications to your event. To begin, navigate to the 'Notifications Page' through the Navigation Menu on the left-hand side. Once there, you should see a list of existing notifications, as depicted below, or an empty list if no notifications have been added yet. At the bottom of the page, you will find two buttons: 'CREATE NOTIFICATION' and 'REFRESH'.
.png?h=ee24b5241e3b97c451a41bf98511675c)
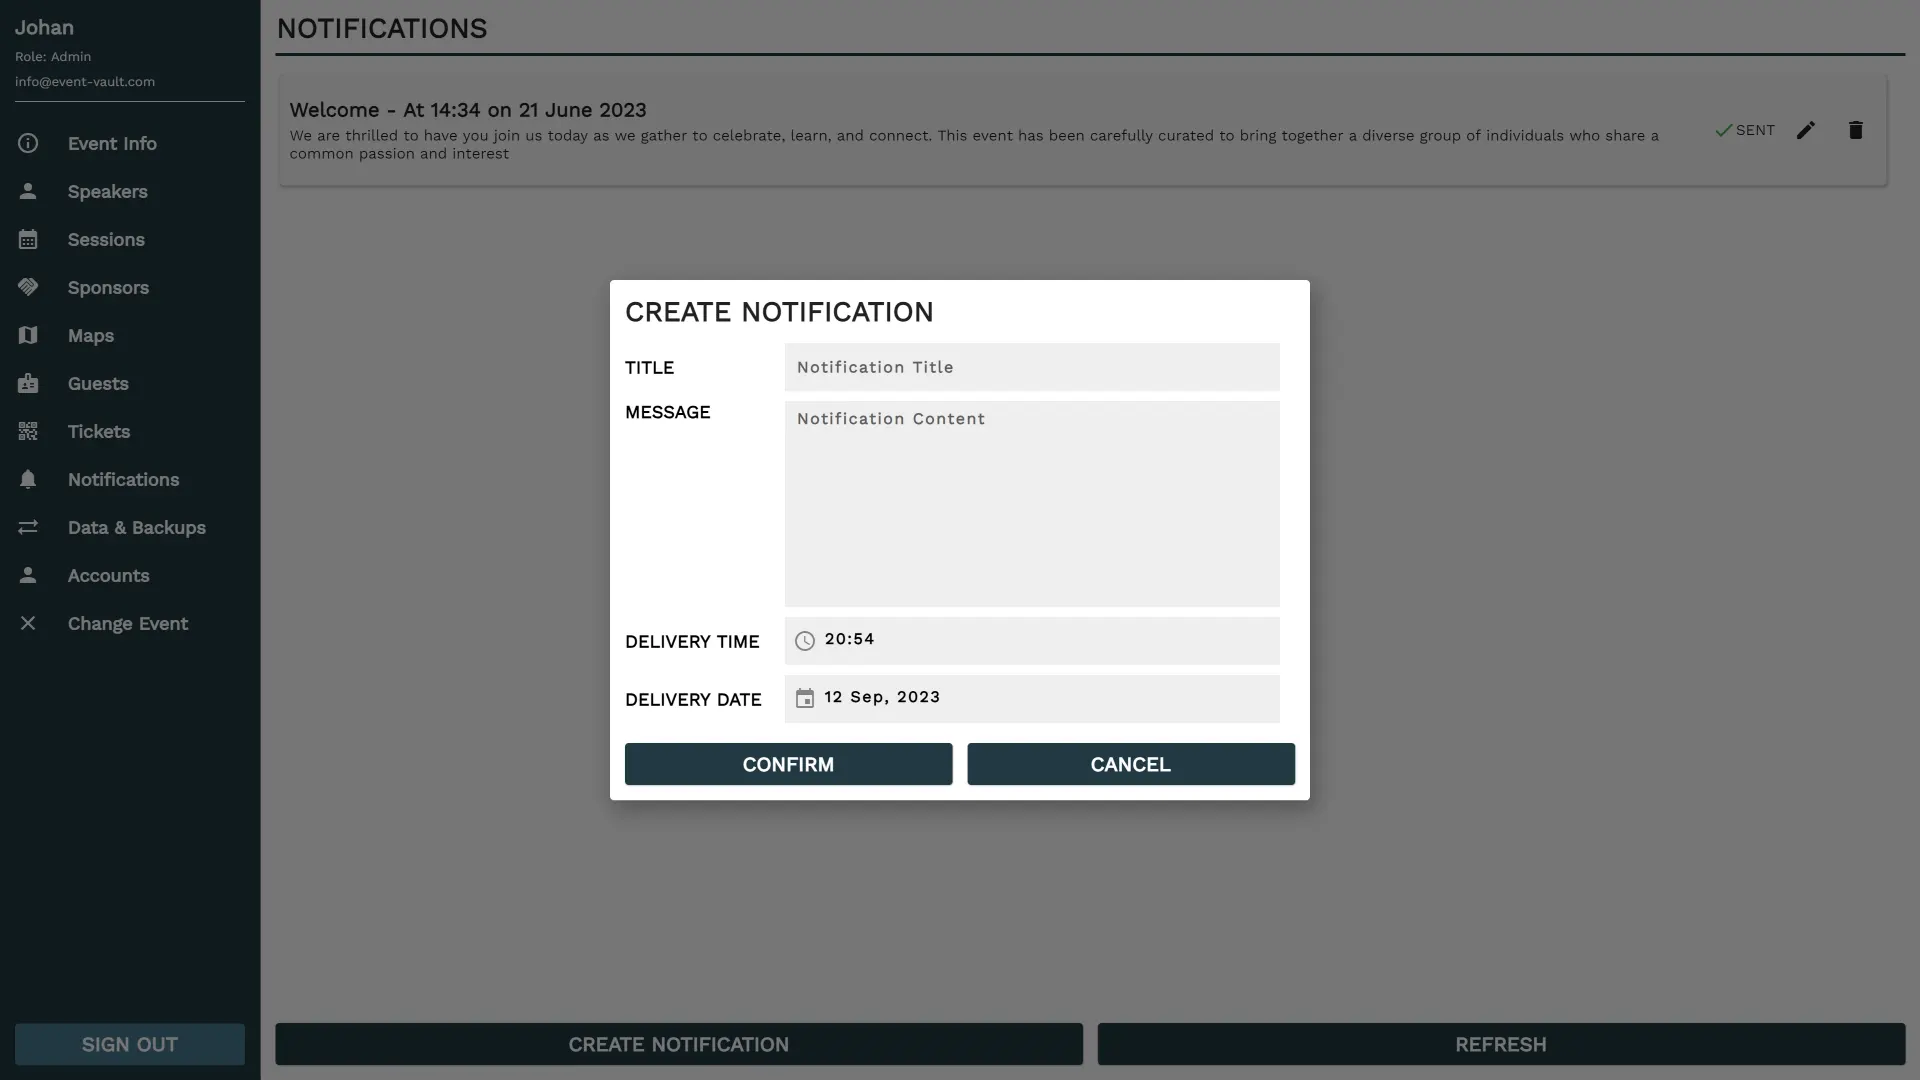
To initiate the process of creating a new notification, click the 'CREATE NOTIFICATION' button. This will open the notification creation menu, as illustrated in the accompanying image. Within this menu, you can populate the following fields:
| FIELD | DESCRIPTION |
|---|---|
| TITLE | Input the title of the notification for clear identification. |
| MESSAGE | Provide the message content that will be delivered to the guests. |
| DELIVERY TIME | Specify the time at which the notification will be sent. * |
| DELIVERY DATE | Indicate the date on which the notification will be dispatched. |
Each notification you create will display a status, indicated by either a green checkmark for 'Sent' or a red cross for 'Not Sent'. Notifications can be modified up until the point they are dispatched.
* The delivery time for notifications is in local time, based on the time zone you selected on the 'Event Info' page. For more details on setting the time zone, please refer to the 'Initial Setup' page. Editing can also only be done up to the point where the notification is sent out.
To modify or remove a notification after it has been created, locate the corresponding 'Edit' or 'Delete' icon next to each notification in the notification list. Clicking these icons will enable you to edit the notification's details or remove it from the event.
CONTINUE TO TICKETS