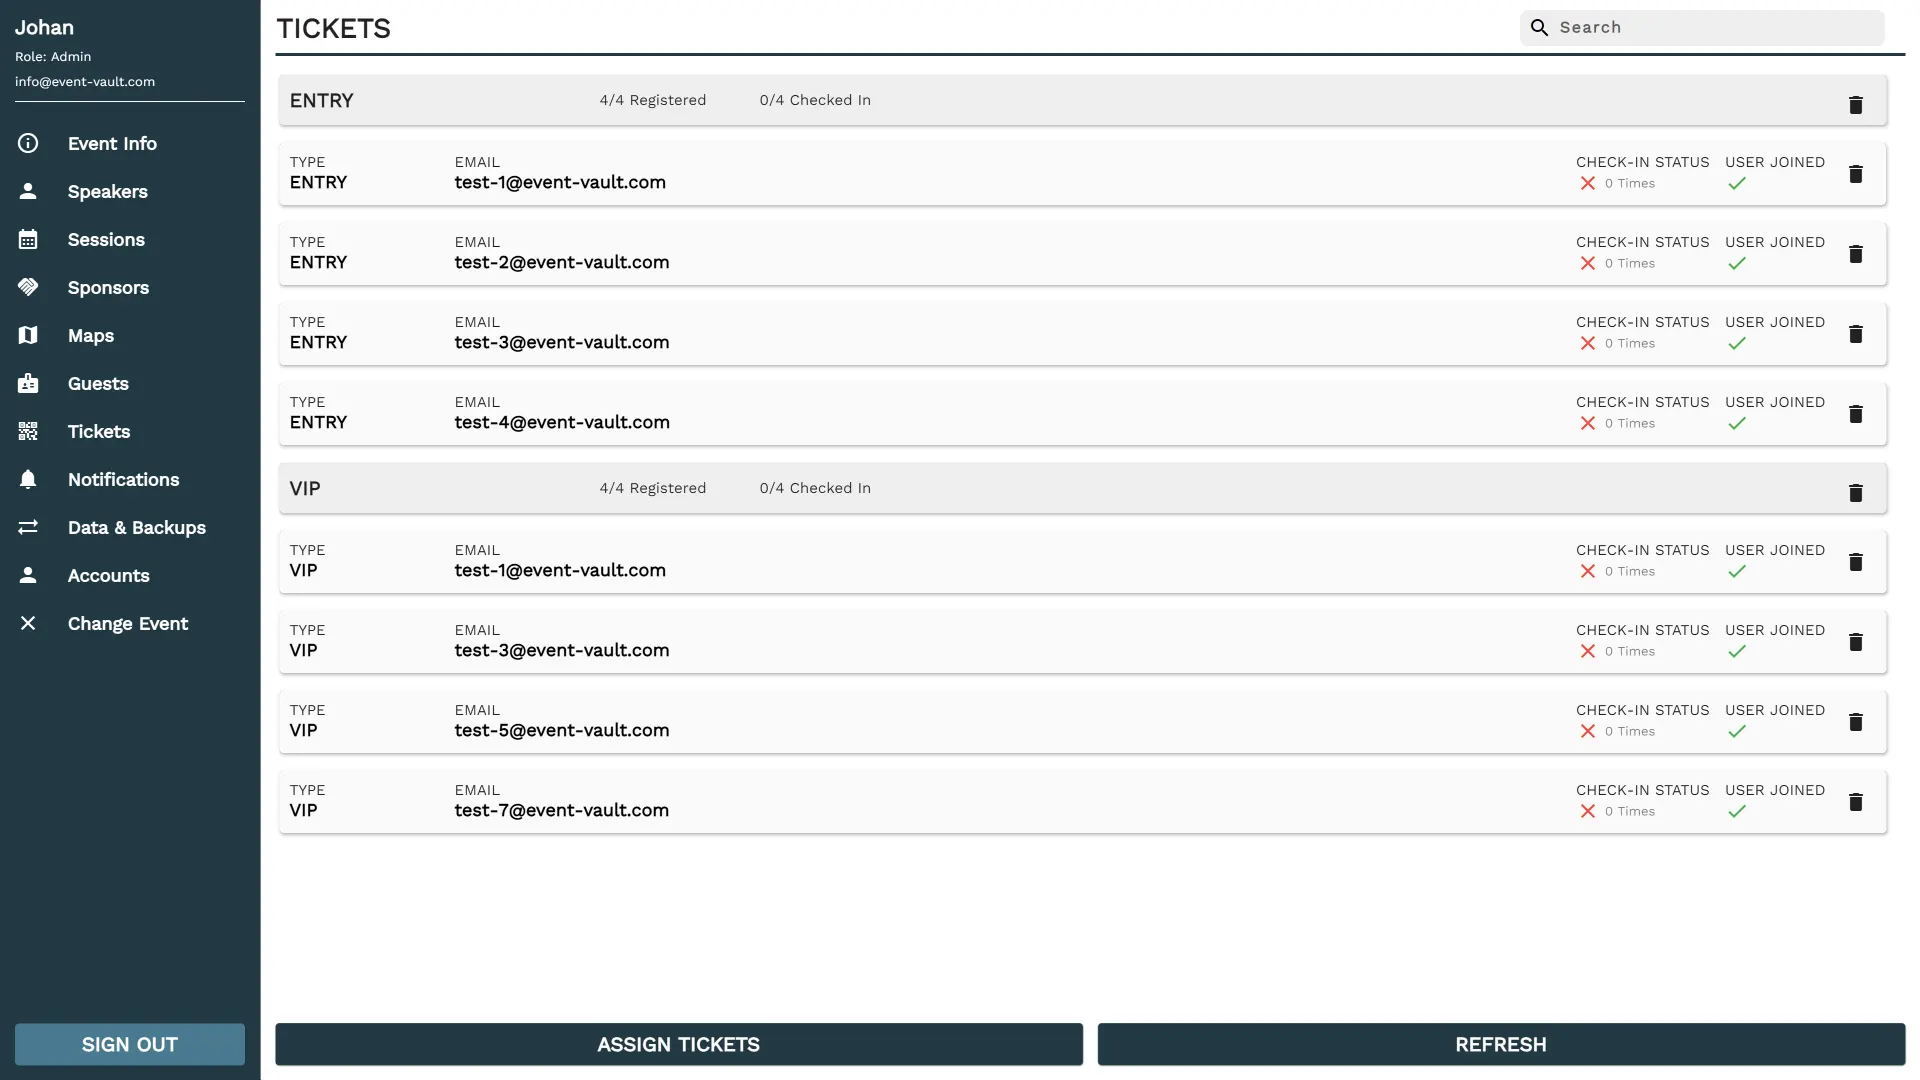
TICKETS
This section provides a step-by-step guide on how to add tickets to your event. To start, first navigate to the tickets page via the Navigation Menu on the left. Once there, you should see a list of tickets if you have already created some, as shown below, or a blank list if you haven't. At the bottom of the page, you should see two buttons: 'CREATE TICKET' and 'REFRESH'.
Each ticket displays the current check-in status, indicating whether a user has joined the event through any of the methods outlined in the Invitations and Access page. Users can be checked in via the companion app, and the number of check-ins can be used to validate tickets.
This system is designed to provide maximum flexibility with any payment system you are currently using, as it only requires email addresses for ticket issuance.
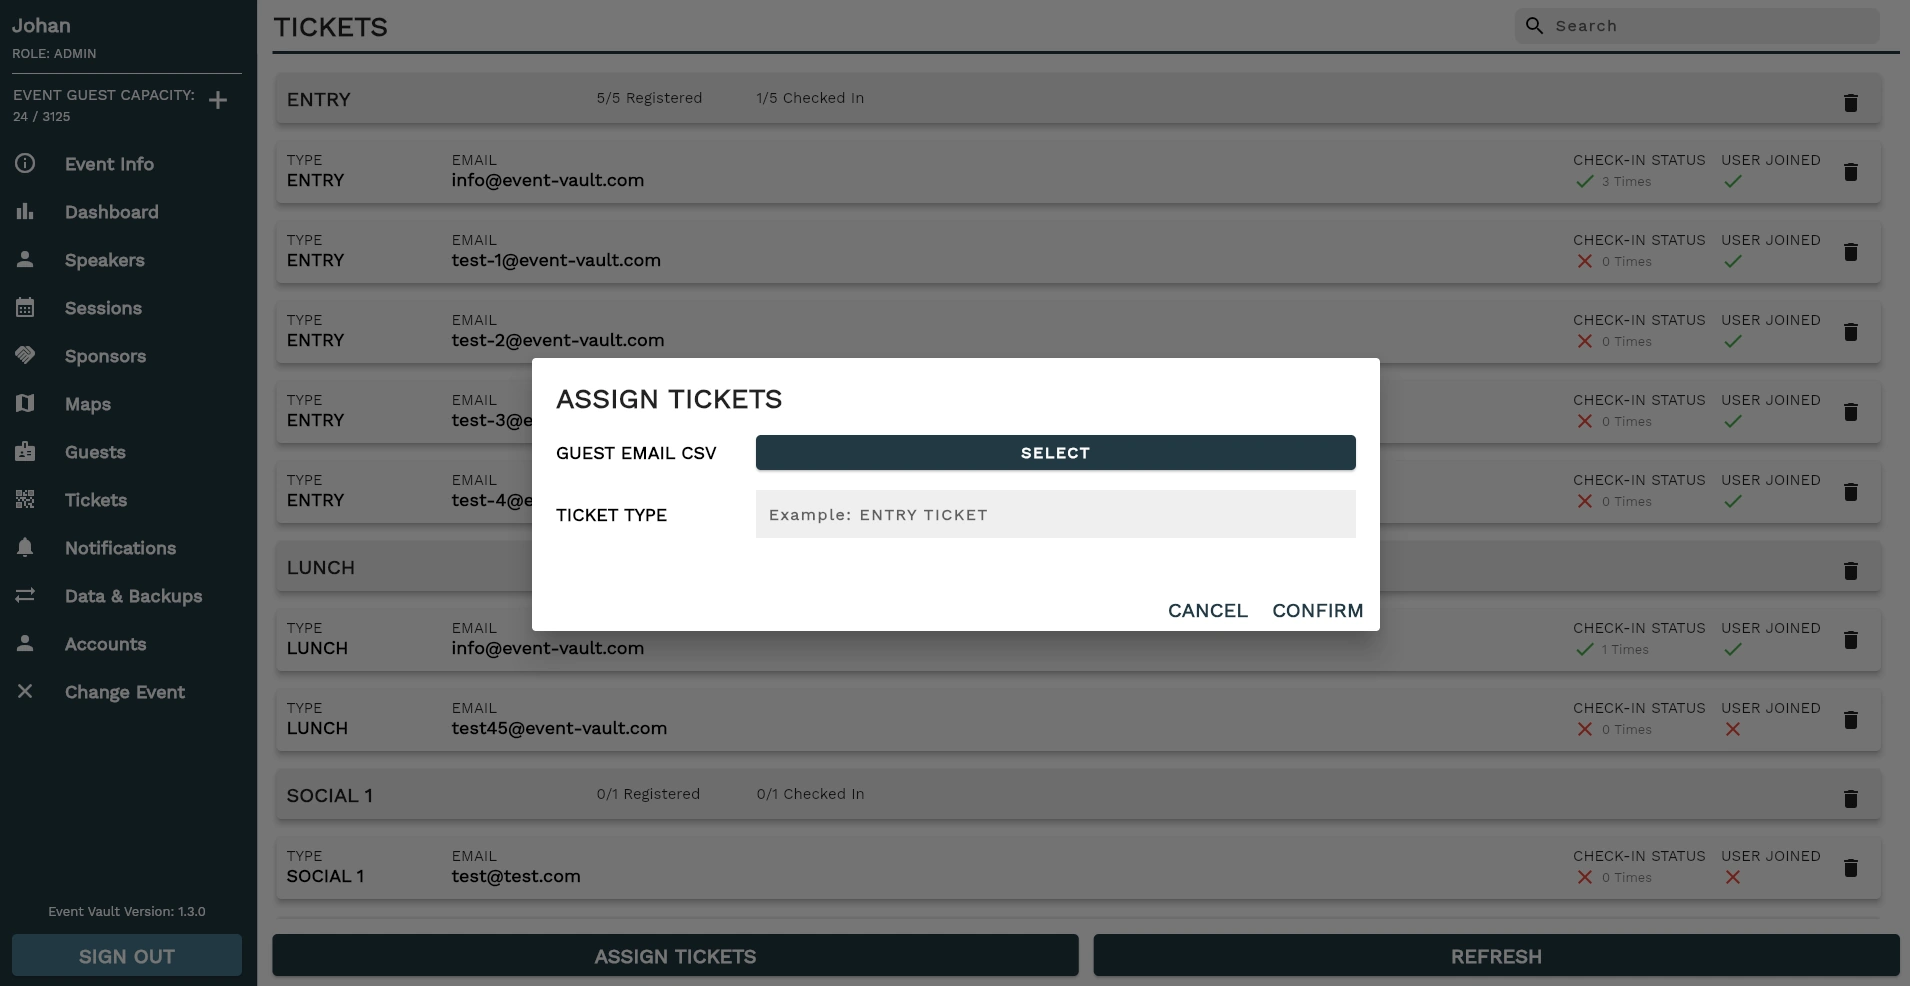
To start issuing tickets for your event, click the 'ISSUE TICKETS' button. This will open the ticket issuing menu, as illustrated in the accompanying image. Here you can input the following fields:
| FIELD | DESCRIPTION |
|---|---|
| GUEST EMAIL CSV | Select the CSV file which contains the assignable email addresses, see the DATA FORMAT section for the structure. |
| TICKET TYPE | Specify the ticket which you would like to assign (This can be anything you want) |
DATA FORMAT
The CSV file must use a comma (,) as the delimiter, with all fields in text/string format, Each entry should be on a new row. For data formatting please see the table below. Download Example File (Open with notepad to see and check formatting)
| COLUMN | A |
|---|---|
| FORMAT | String |
| CONTAINS | Guest Email adress |
We currently do not offer a built-in purchasing system for tickets. However, we are actively working on developing one that you can opt to use in the future. In the meantime, our flexible system allows you to integrate with any existing payment or ticketing solution you may already be using.
To remove a ticket after it has been created, locate the 'Delete' icon next to each ticket in the ticket list. Clicking this icon will remove the ticket from the event.